How to Plan a Trip on Google Maps: Multi-Stop Routes & Day-by-Day Itinerary
A step-by-step guide to planning a trip in Google Maps, from a blank map to a route you can follow on your phone. You'll build a multi-stop route in Google My Maps, sort your places into a day-by-day itinerary with colored pins and layers, and share the map with the people you're traveling with. The last section covers how to tell when a trip has outgrown Google Maps.
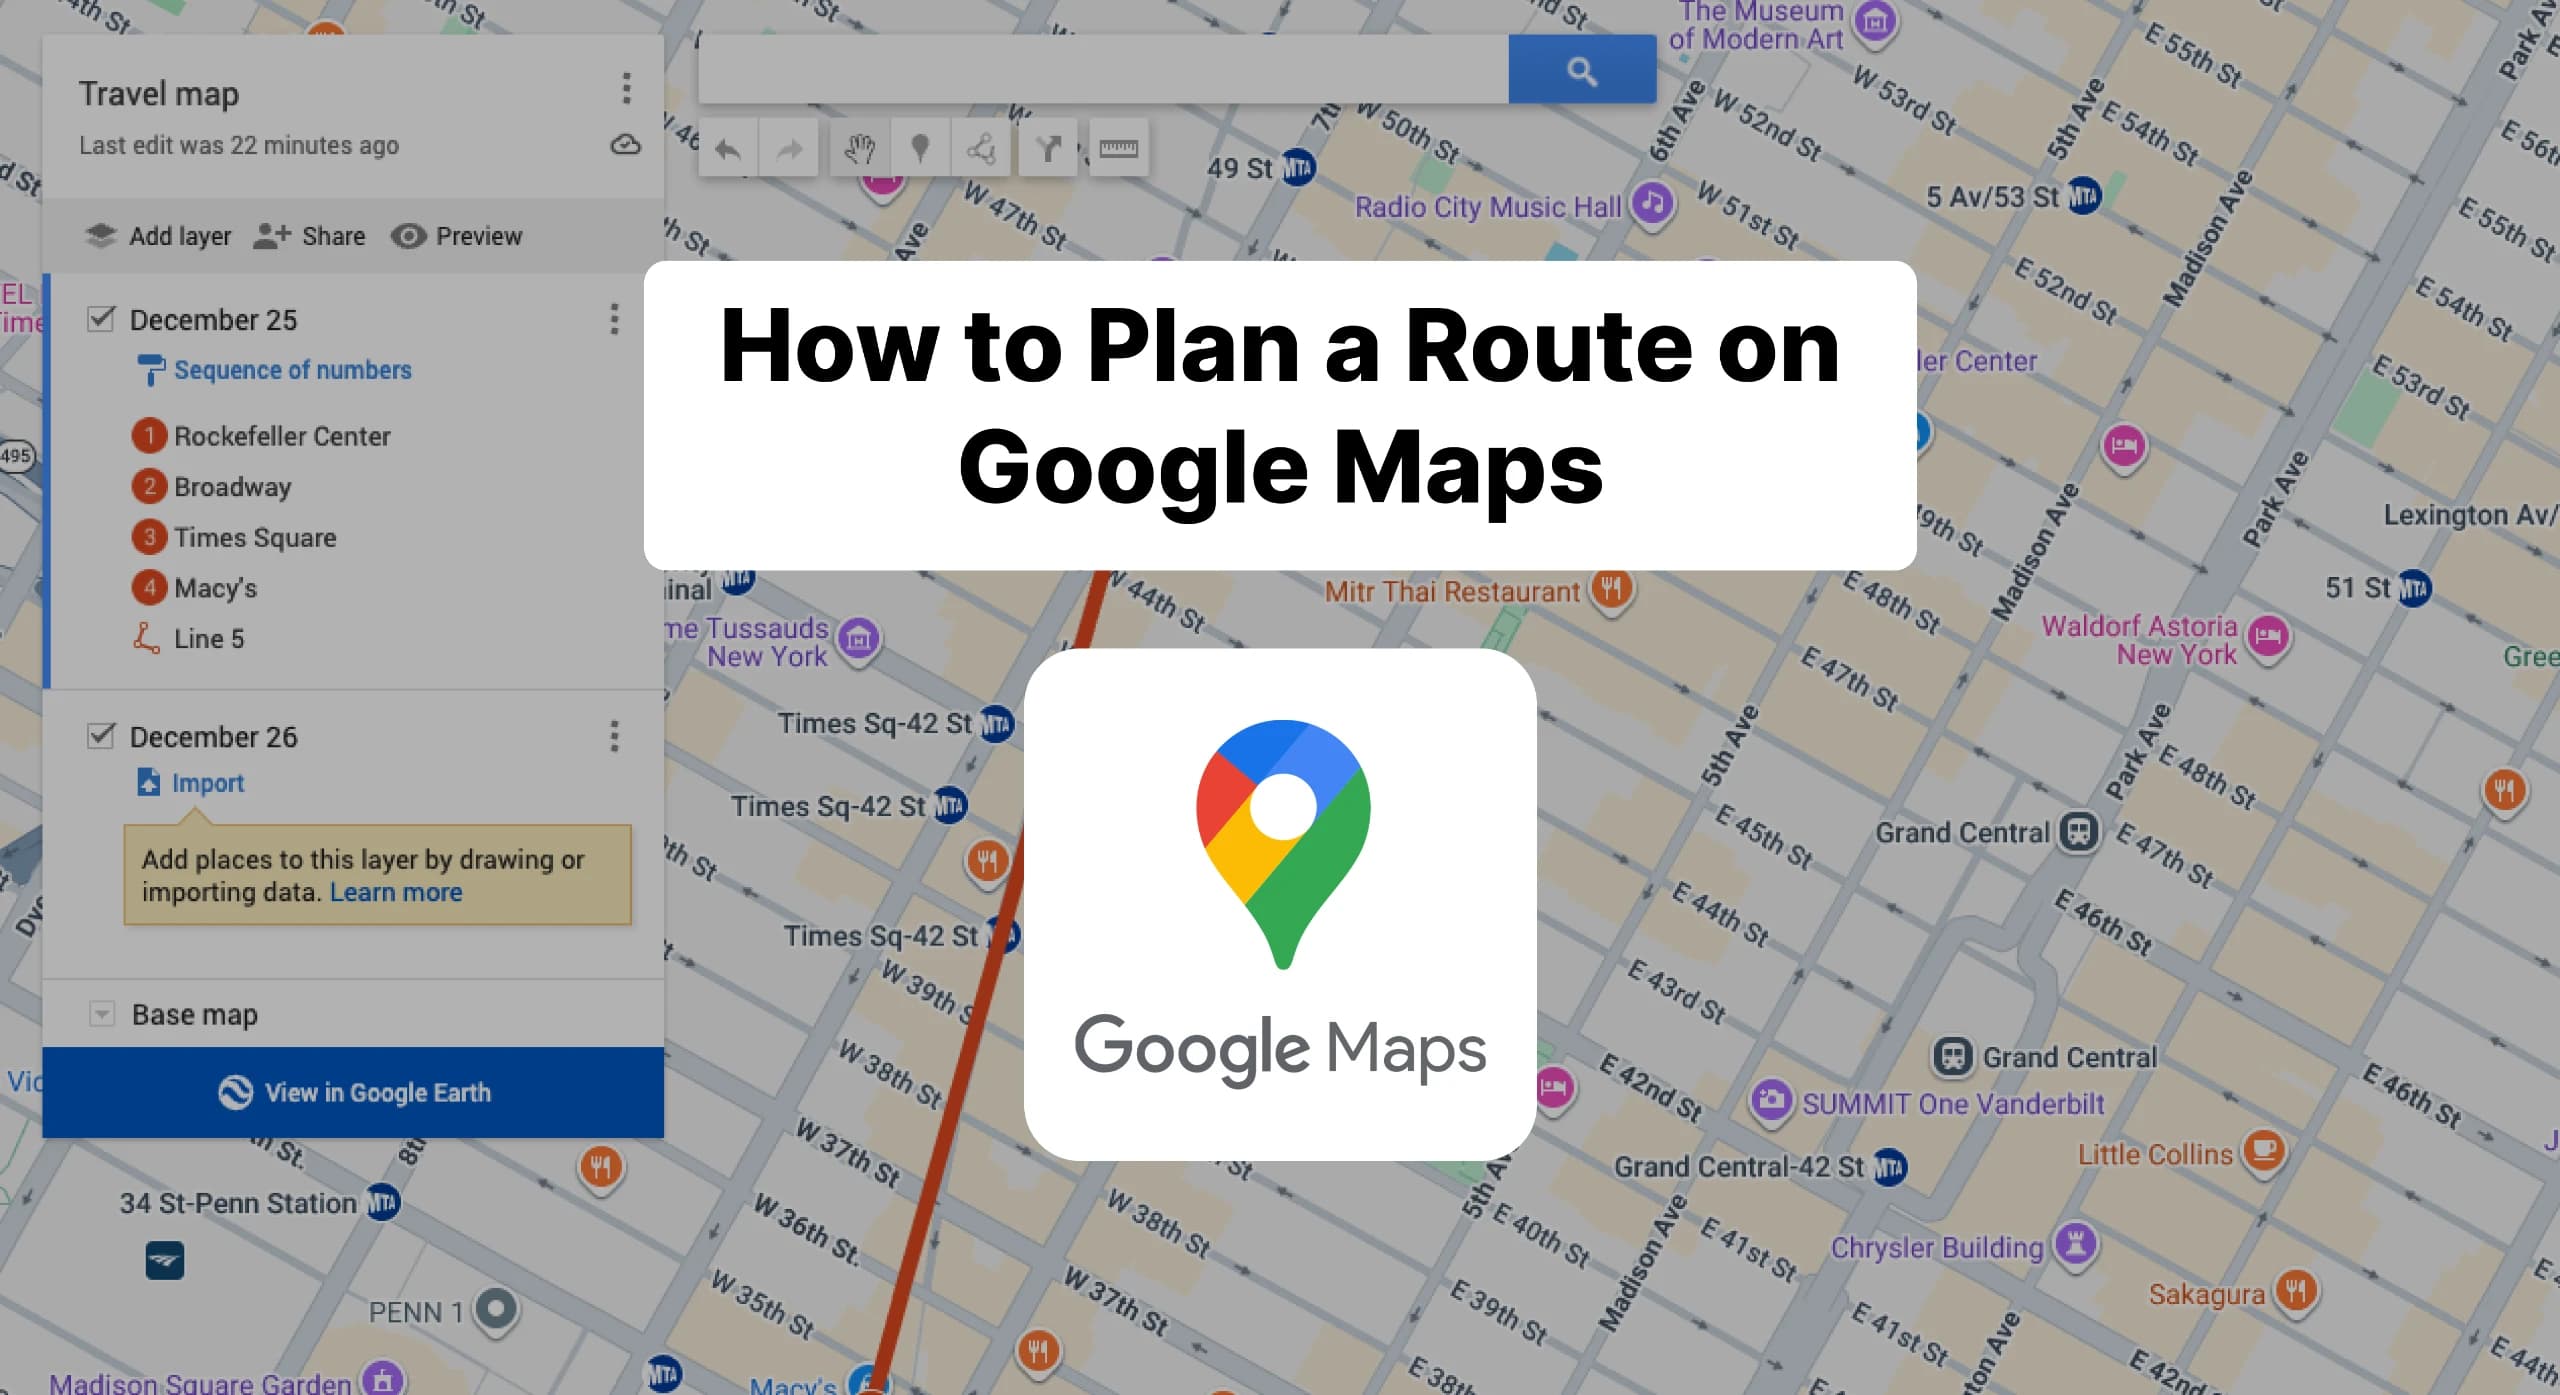
Yes, you can plan a whole trip in Google Maps for free, and this guide shows you exactly how. You'll build a multi-stop route, split your places into a day-by-day itinerary, and share the finished map with everyone you're traveling with. All of it runs on Google My Maps, the part of Google Maps built for saving and arranging a lot of places at once, so start there rather than the regular Maps app.
Step 1: Create your map in Google My Maps
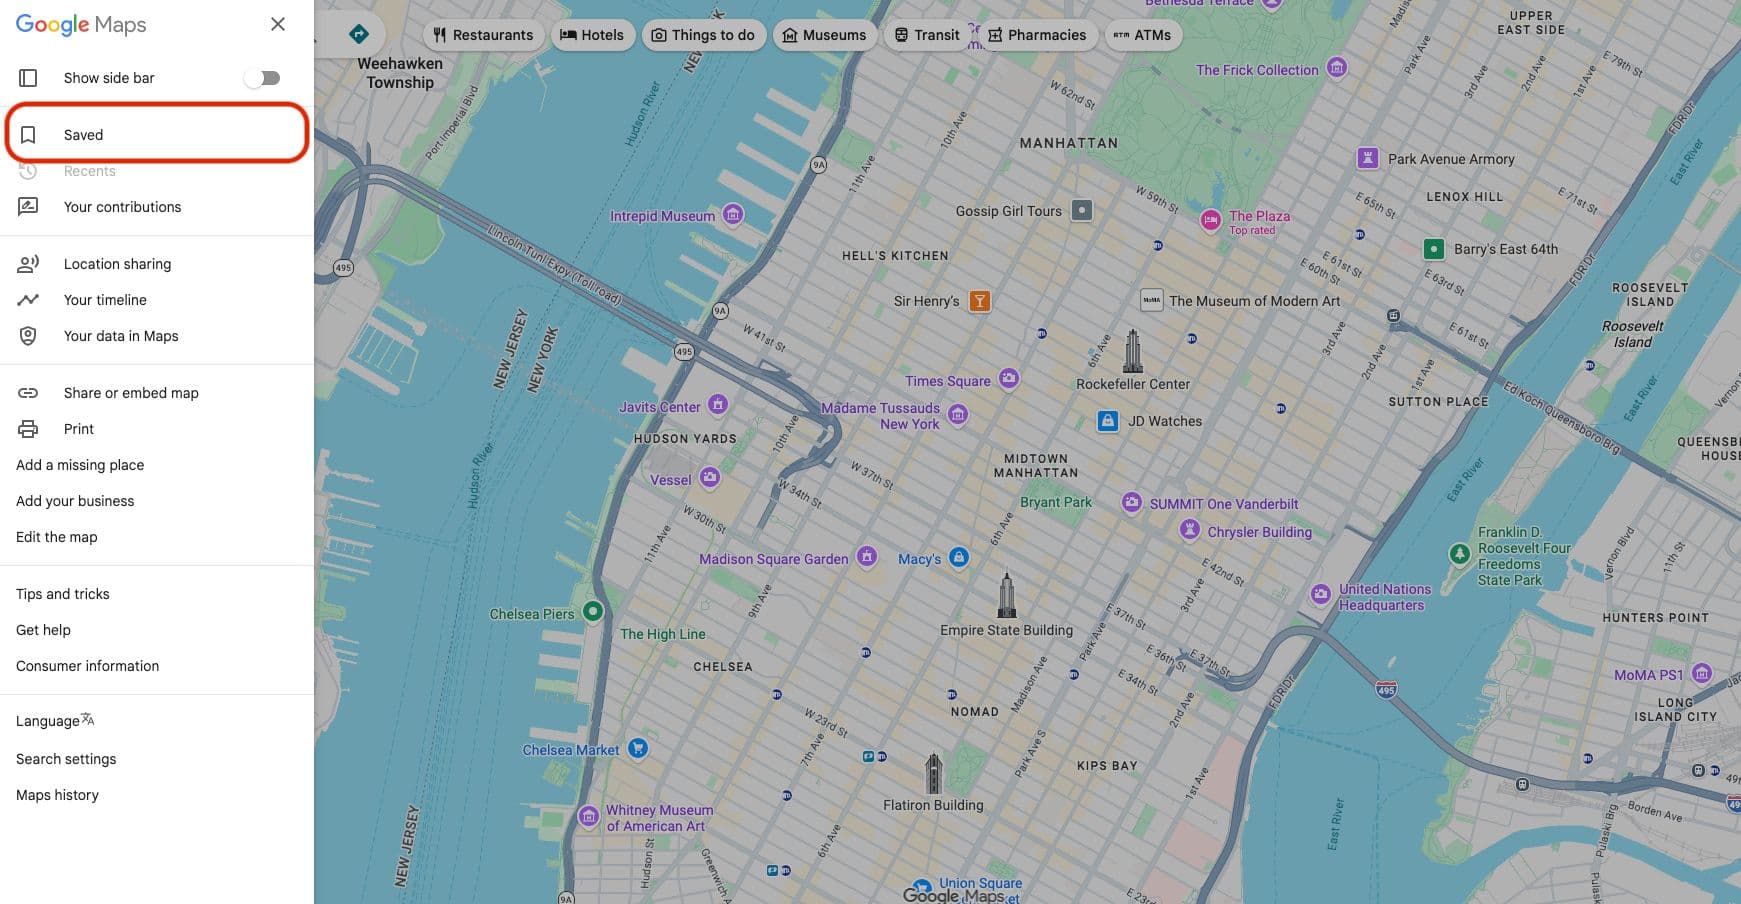
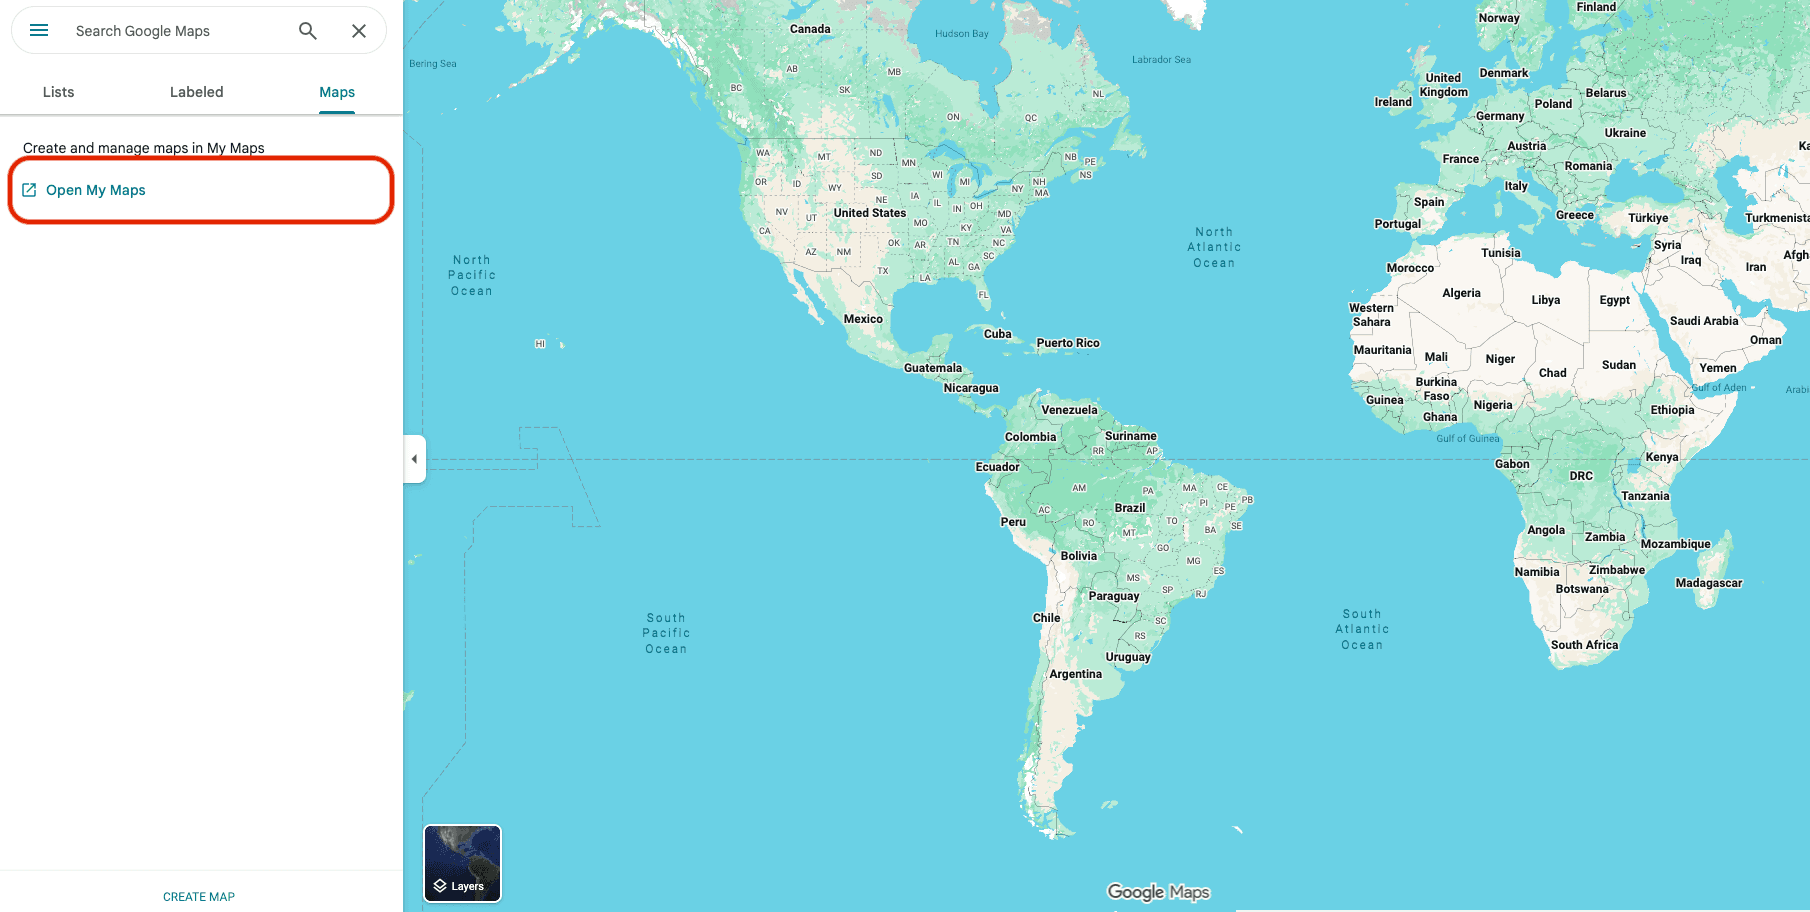
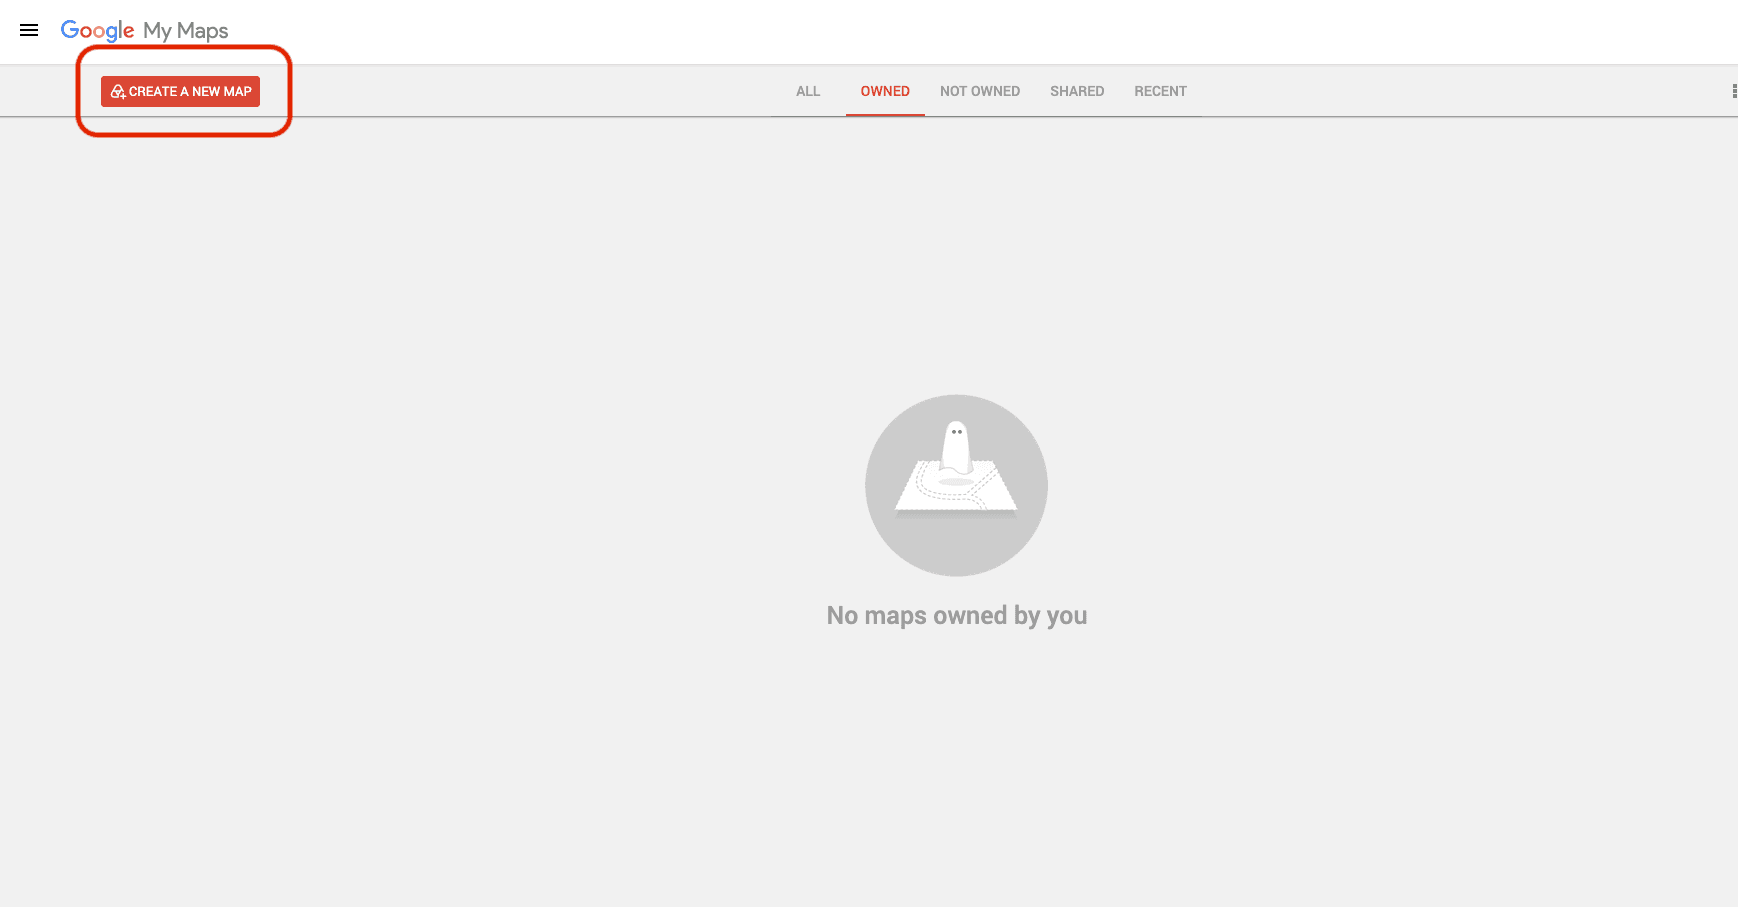
Go to google.com/mymaps in a browser and sign in to your Google account, then click Create a new map. This is Google My Maps, not the regular Maps app. Regular Maps at google.com/maps is for looking up directions; My Maps at google.com/mymaps is where you build and save a custom map with all your stops on it. You can do this on a phone, but a bigger screen makes the whole thing far less fiddly, so use a computer if you have one. Open the sidebar in the top-left corner and click "Saved." You'll see tabs across the top: Lists, Labeled, and Maps. Click "Maps," then click "Open My Maps." A new Google My Maps window opens. From there, hit the red "Create a new map" button in the top-left, and your map gets saved to your Google Drive automatically. There's a faster way if you already know where you're headed: just go straight to google.com/mymaps and skip the clicking. Either path lands you in the same place, with a blank map ready to fill.
Step 2: Add your places and build a day-by-day itinerary
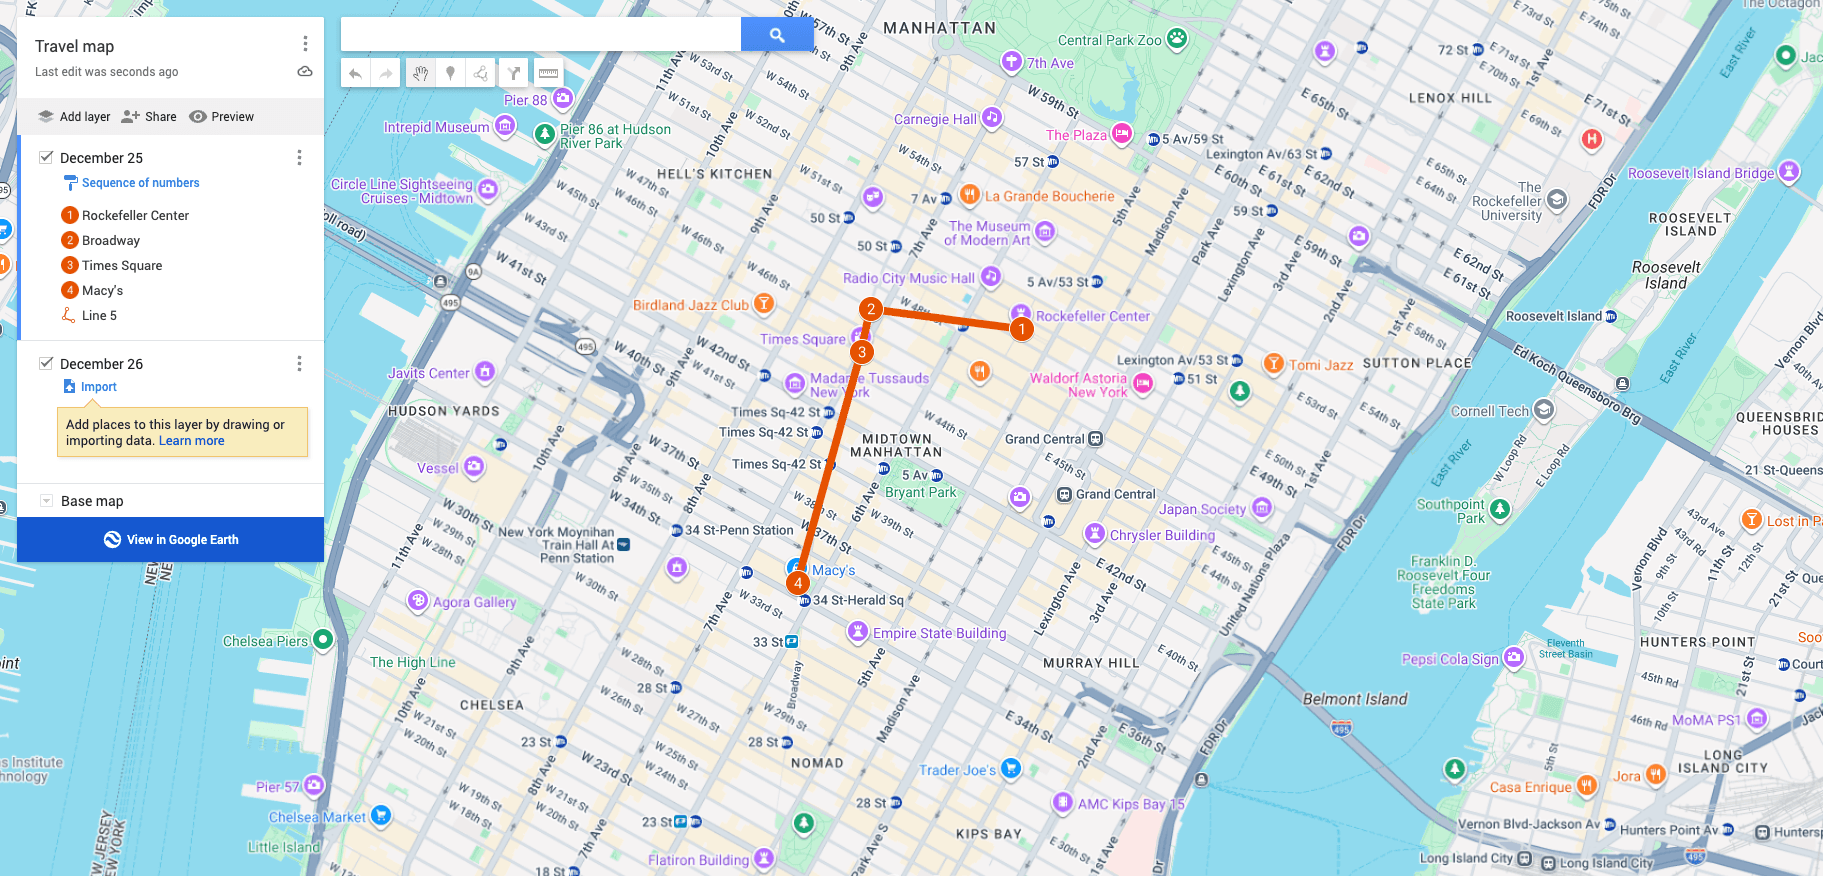
Search for the place you want, or find it on the map and click it, then hit "Add to map." You'll see it drop into a layer in the left panel. Think of a layer as one group. I usually name each layer after a travel date, like "December 25" and "December 26," so each day of the trip has its own bucket. Use the add-layer button at the top of the panel to create more, and drag places from one layer to another whenever you want to move them. This is the part that makes My Maps feel like a real planning canvas instead of a pile of pins.
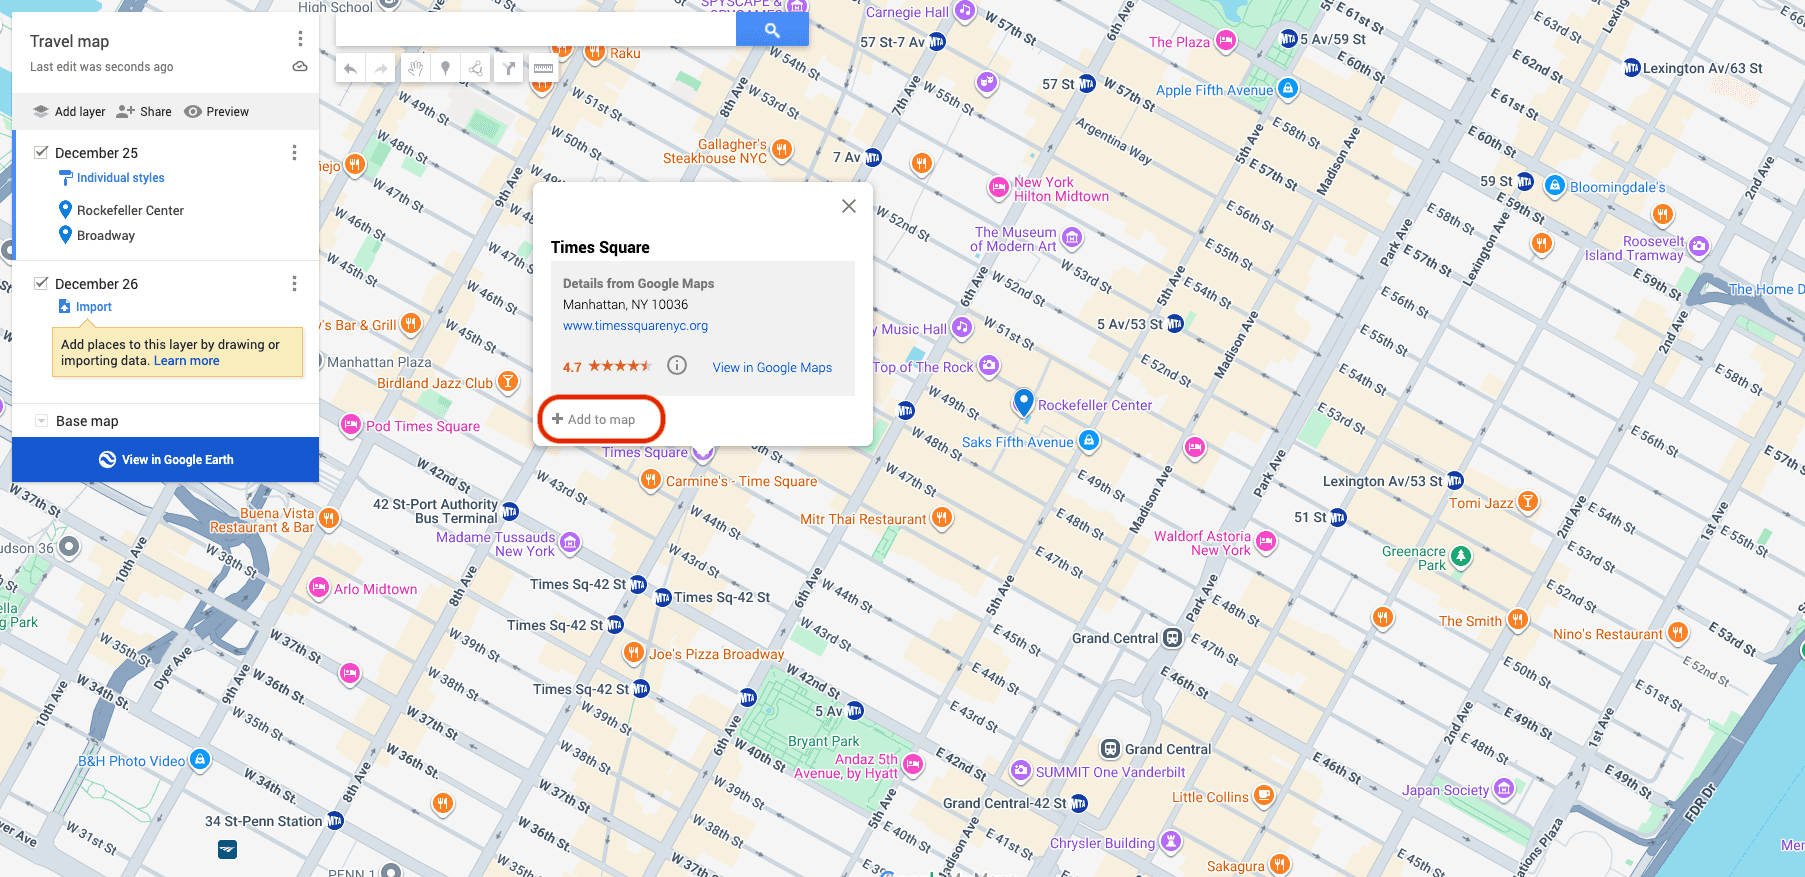
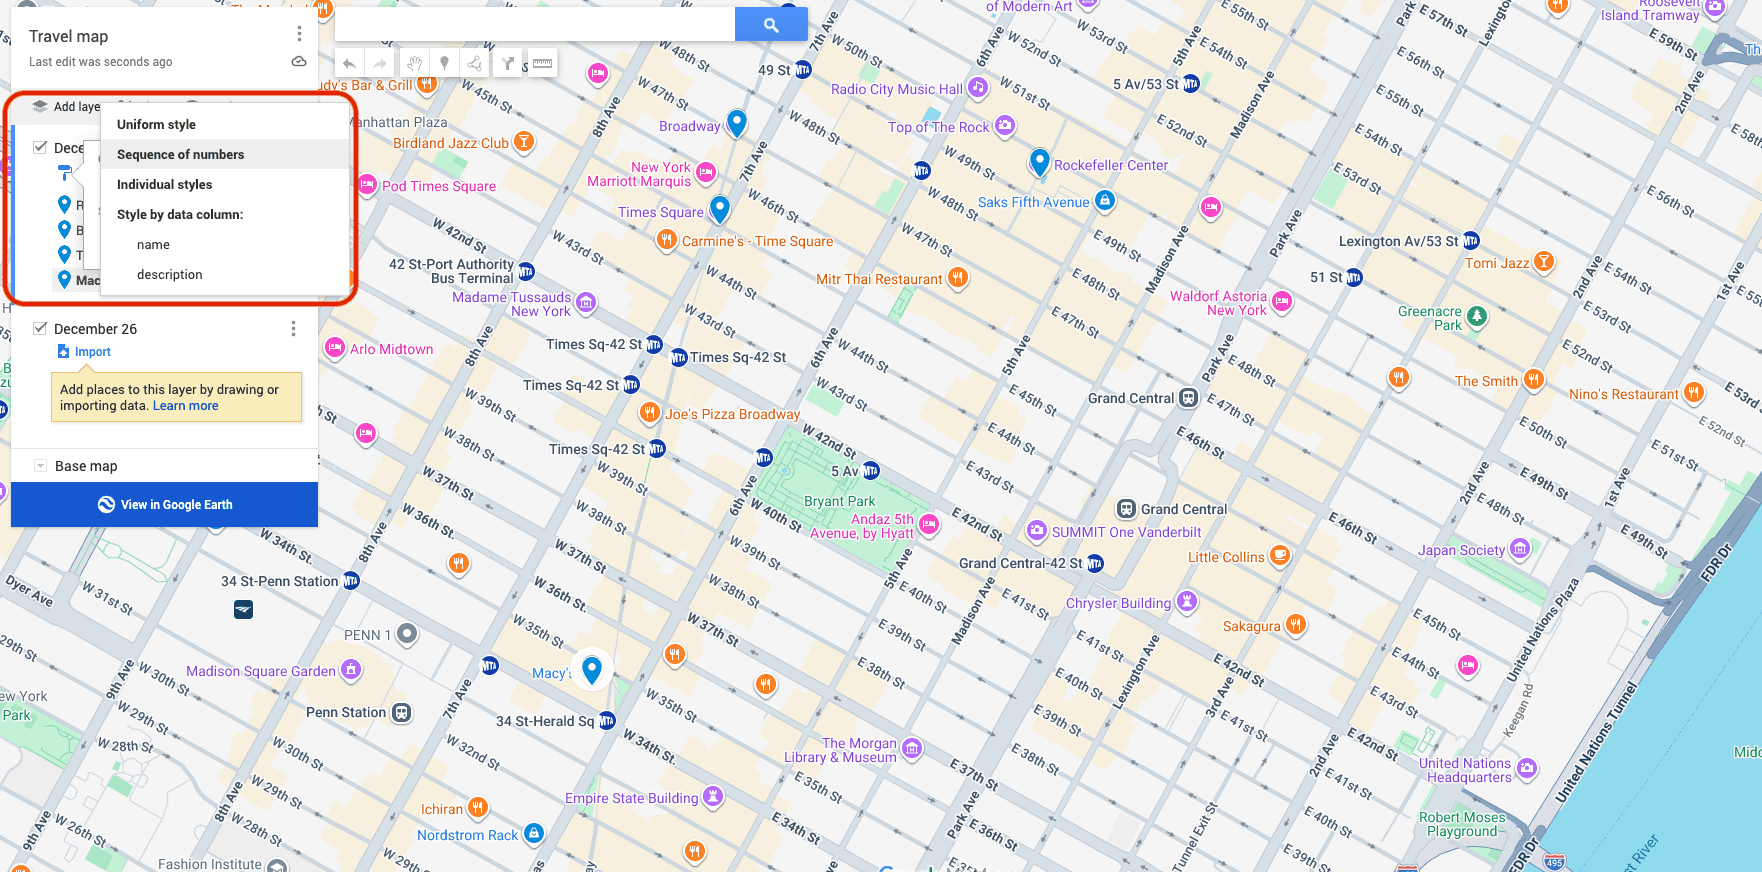
Under a layer's title there's an option for individual styles, and this is worth setting. I usually switch it to "sequence of numbers." That way each place shows the order you'll visit it in that day, so the flow of the day reads at a glance instead of you guessing which pin comes first.
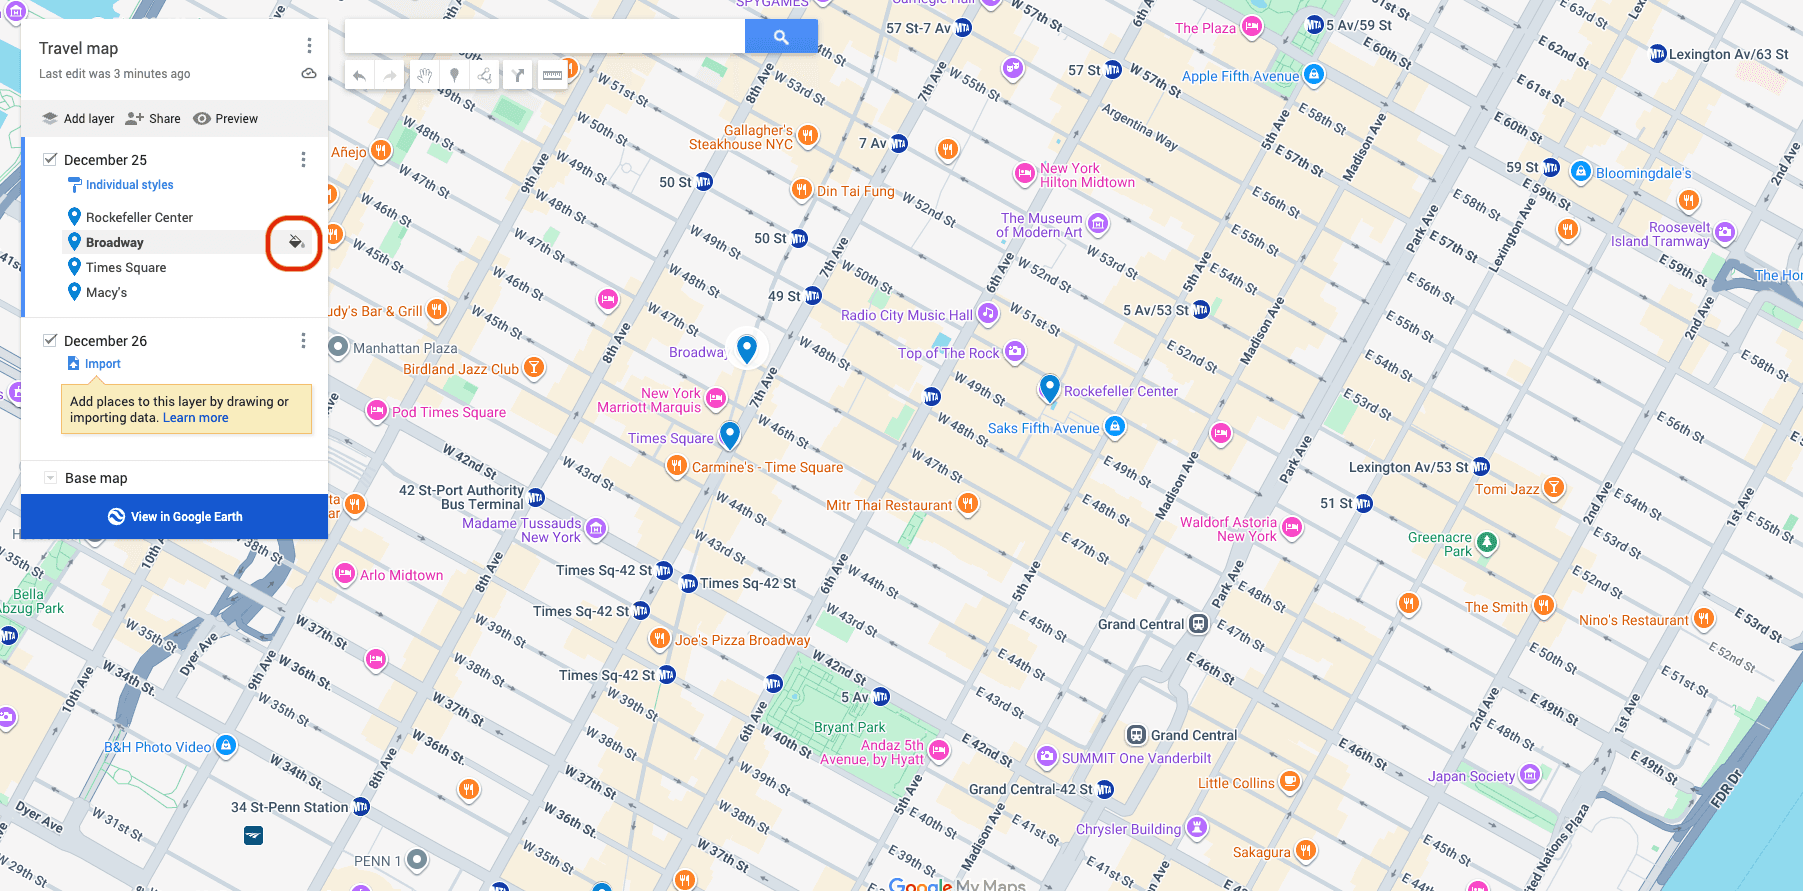
Once you've stacked up a few layers and a lot of places, the pins all end up the same color and blur together. Fix that: hover over a place in the panel and click the little paint icon on the right to change its pin color. Give each day its own color and the whole map suddenly makes sense.
Step 3: Connect your stops into a driving route
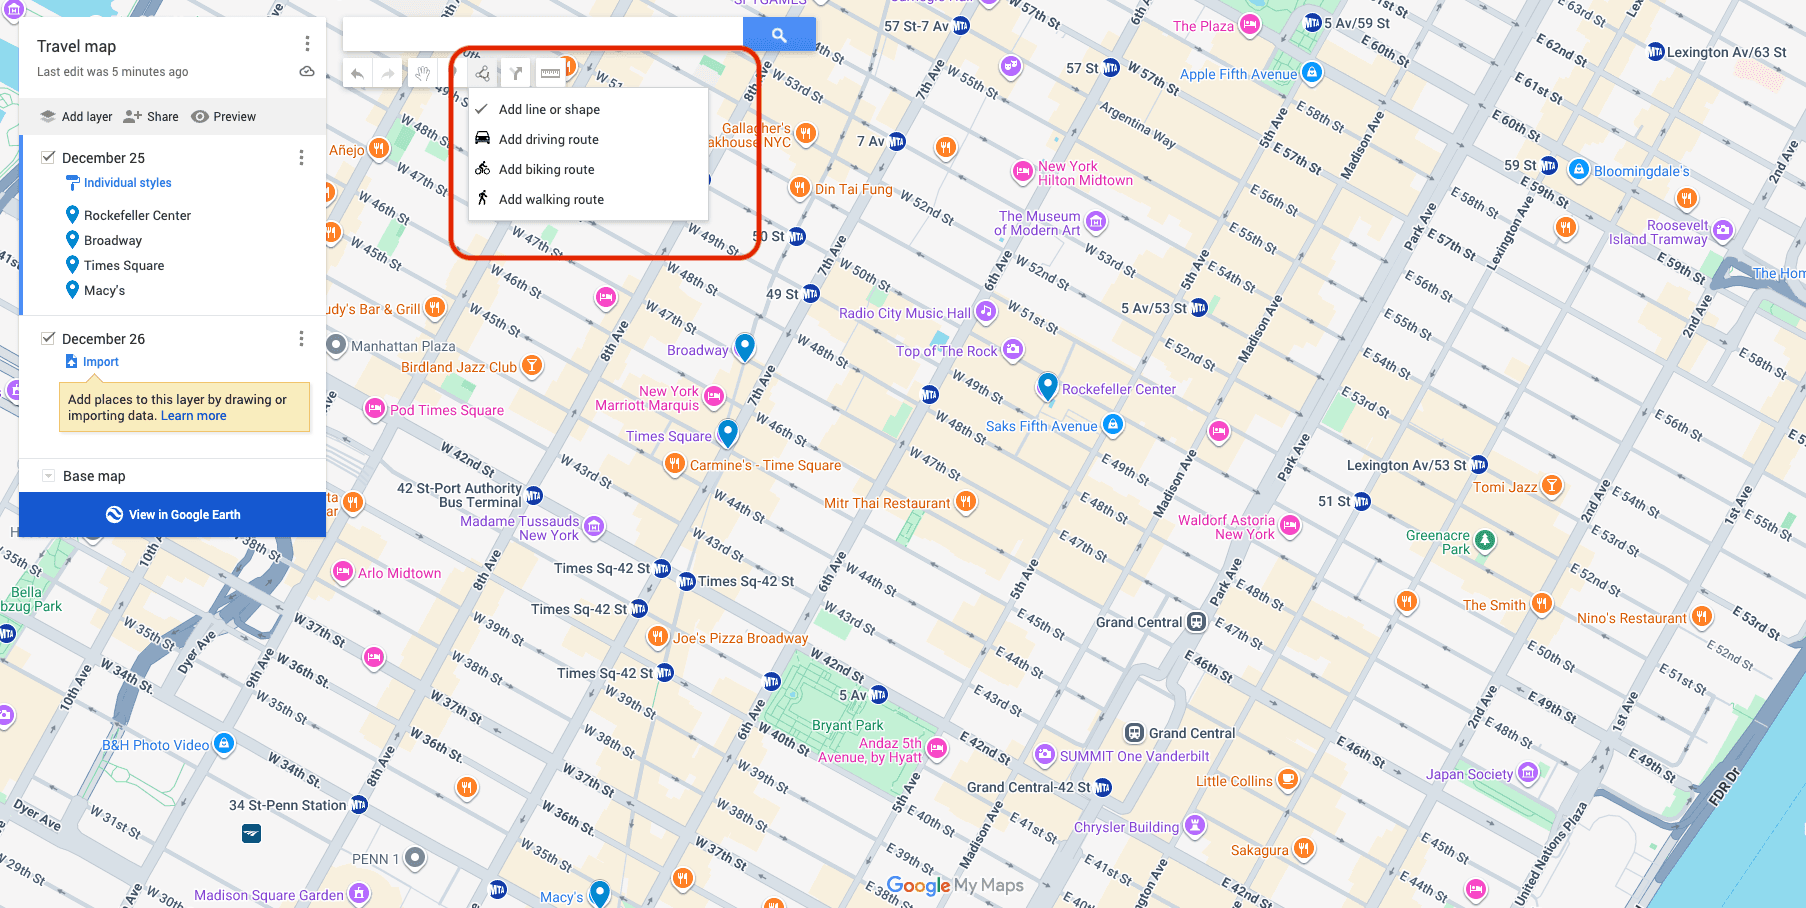
Places on their own are just dots. Connect them and the day starts to look like a plan. Below the search bar in the top-left, there's a line icon. Click it and choose "Add line or shape" to connect your pins to each other. Now you've got a day of stops laid out as points and lines, and it reads much more intuitively than scattered pins ever did. Drop the line inside a layer and it picks up the color you set back in the last section, so each day's route matches its pins. That same icon also lets you add driving, cycling, or walking routes between places, which is worth trying when you want the real path instead of a straight line. Little by little, the shape of the trip comes together. This is also how you map a road trip: add each stop in the order you'll drive it, and My Maps will draw the driving line between them.
Step 4: Check it on your phone and share it
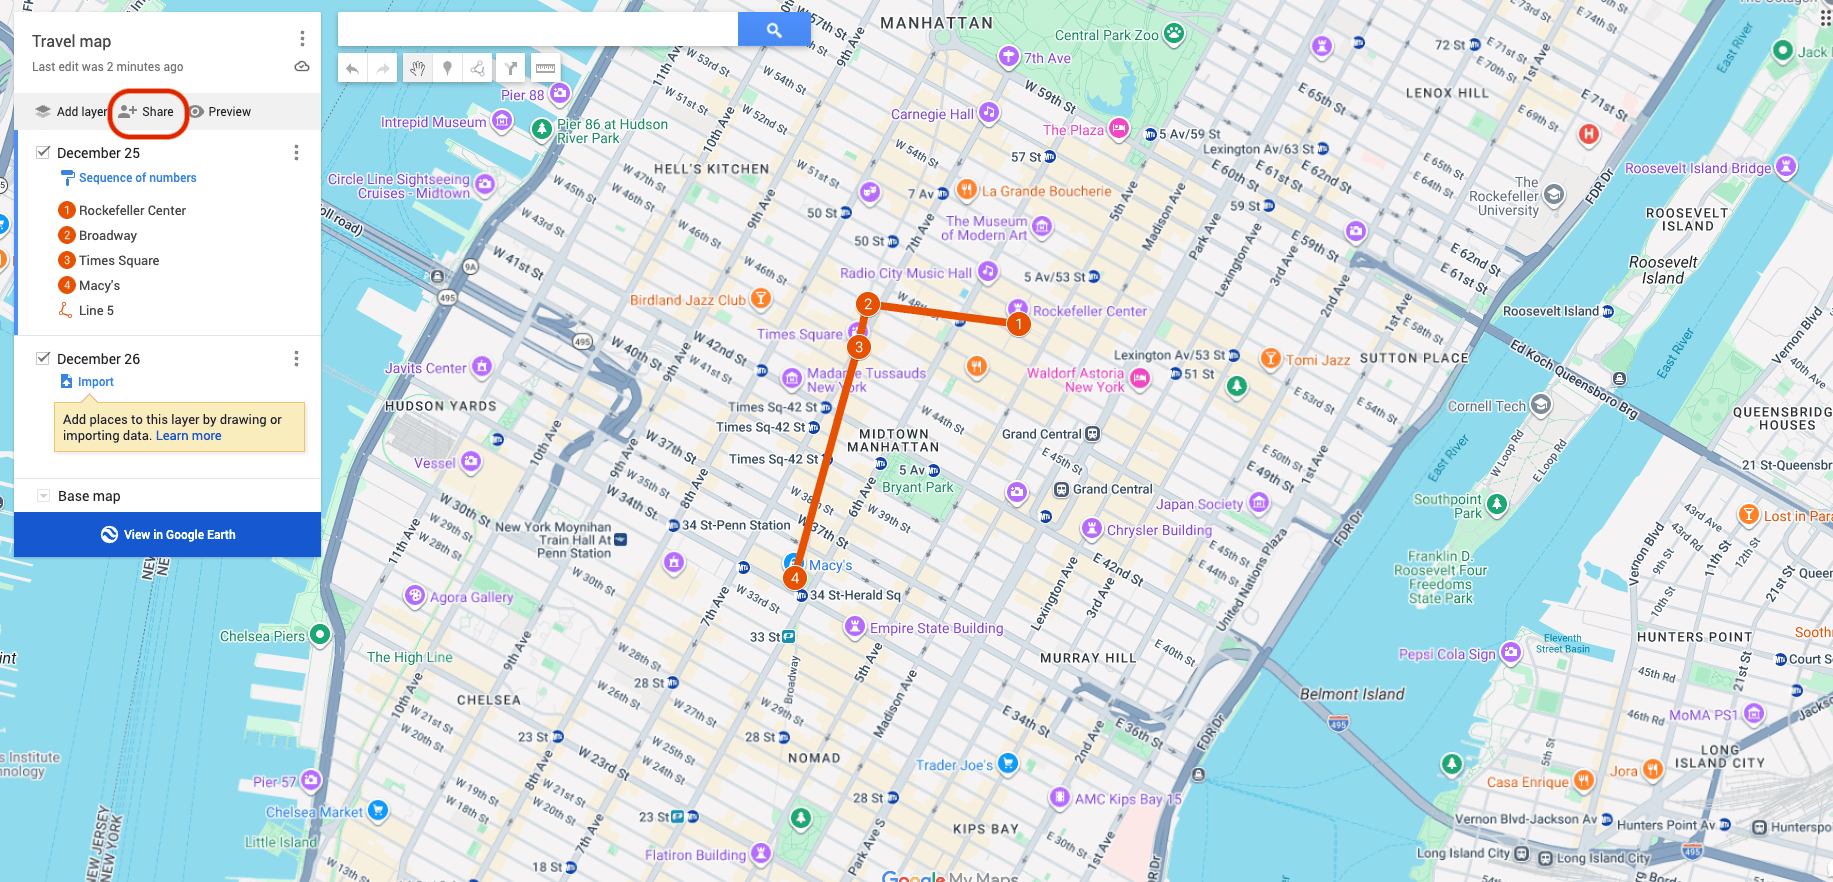
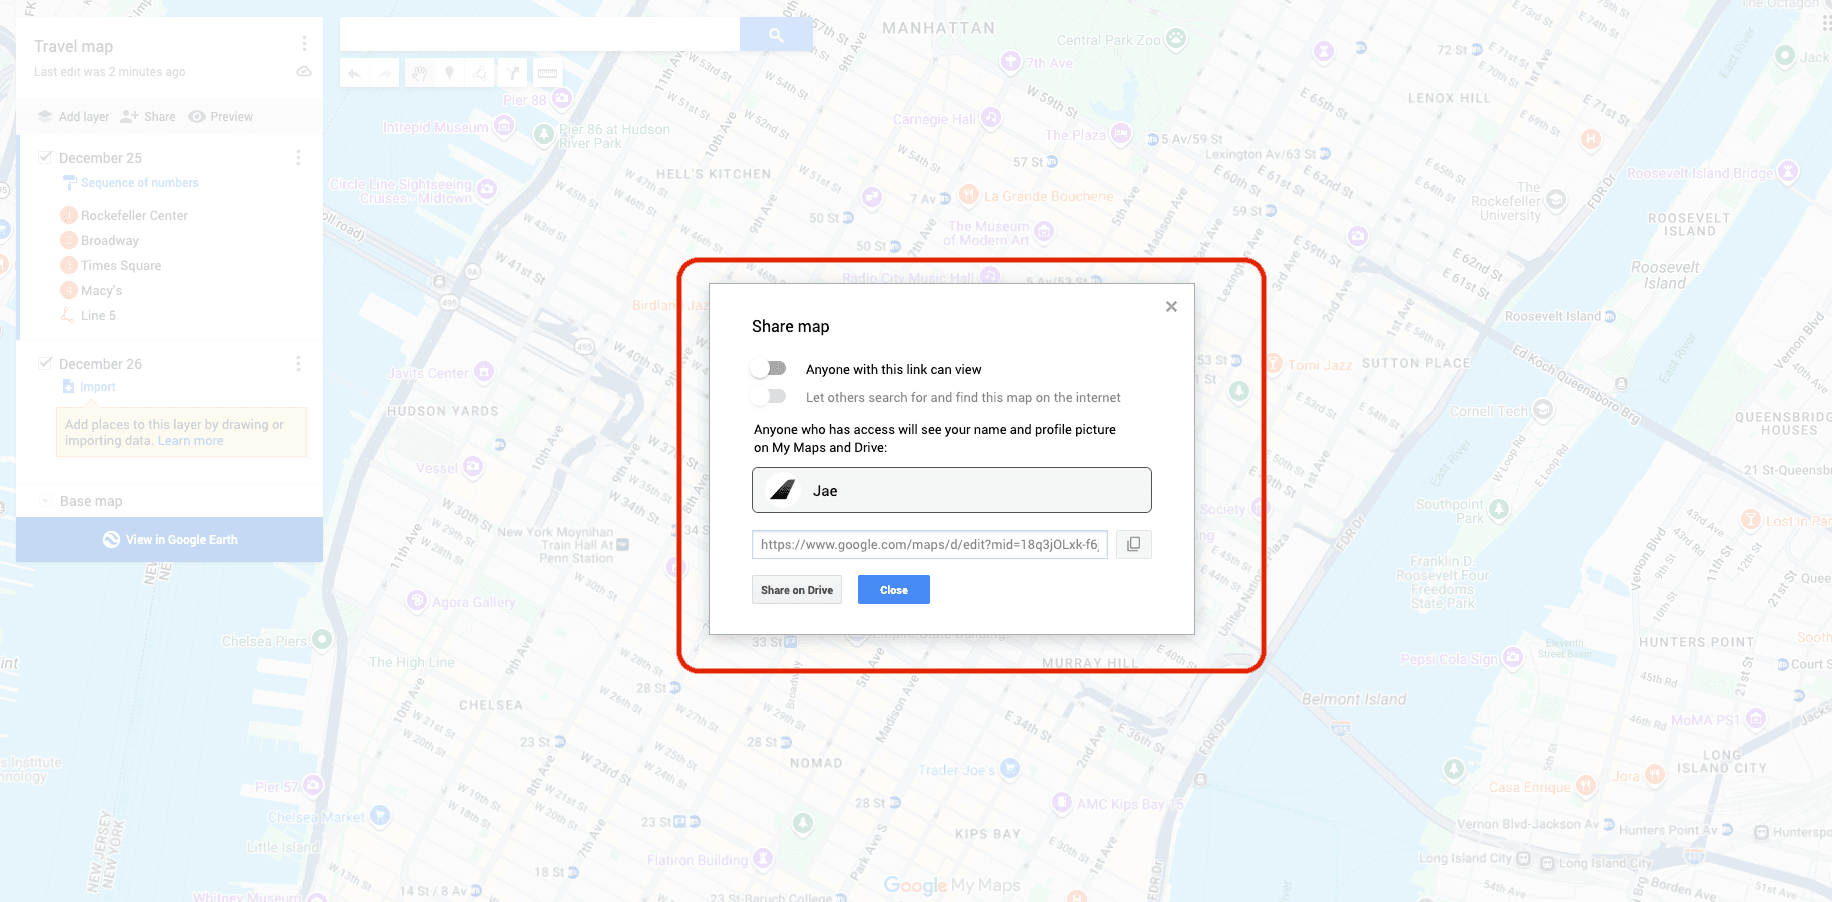
The map you build on desktop is waiting on your phone too, so you can pull it up on the road without doing anything extra. To bring in the people you're traveling with, use the share button at the top of the panel. A share window opens, copy the link, and send it to everyone coming along. One thing to check before you send it: turn on editing access in that share window, otherwise the link is view-only. Once they have edit access, they can work on the route right alongside you, adding their own places and moving things around, not just watching. That's a real difference when a trip has more than one opinion in it.
Where Google Maps starts to run out of room
So Google Maps is intuitive and easy, but its limits are just as clear, and the more you use it the more you start wishing for things it doesn't do. Layers don't grow forever, so a long trip can run out of room. Notes are cramped too. I want to write a note on each place and see them all at once, but even though Google Maps lets you add a note per place, you only see it after you click into that place. And a trip plan needs more than pins: it needs a schedule tied to times, notes you won't lose along the way, and an itinerary you can take in at a glance. Google Maps is thin on all of that. Then you start asking where the rest of it goes. Where does the budget live? Where's the checklist? Where do you track how you're getting between cities? Before long you're stitching together three or four apps, and the whole thing gets more complicated instead of less. This isn't a knock on Google Maps. For building a route and keeping it simple, it's good. But the moment you need a plan that runs on time with real detail, and especially when you're traveling as a group, it comes up short.
When you need more, bring it into trablog
If you've already built your plan in Google Maps the way we just walked through, you can bring it straight into trablog without starting over. Open the menu in the top-right of the panel and choose export, then download the .kml file. One thing to watch: it needs to be KML, not KMZ, so make sure the "Export as KML" box is checked. Import that file into trablog and you're done. Your layers come in split into days, and it draws your routes for you. trablog lets you build a day-by-day itinerary just like Google Maps, but without the room running out. It has everything a trip plan actually needs: times, notes, transport, budget, a checklist. It's built to read at a glance, and editing your itinerary is easy drag-and-drop. Plan it on your computer, then pull it up on your phone while you travel. It even gives you Google Maps links so you can see the route between places fast. Sharing with the people you're traveling with is simple too. And trablog is free, with a guest mode that lets you start without an account.

More city guides
See all guides
Days in Tokyo: A First-Timer's Day-by-Day Itinerary
How to Plan a Trip in Google Sheets (+ Free Travel Itinerary Template)

Utah Mighty 5 National Parks Road Trip: The Perfect 7-Day Itinerary (Zion to Canyonlands)
Pacific Coast Highway 5-Day Road Trip Itinerary (San Francisco to Los Angeles)
San Diego 5-Day Itinerary for First-Timers: A Day-by-Day Plan You Can Actually Follow